The Super Cissy
A tribute to history and a love of french fries

The Story
This bike, unlike most of the other Shitbike victims, has some charming history that comes with it. It belonged to my mother (an absolute saint of a woman) who got it when she was working in the bike department of an REI store in the mid 80’s.
It started life as a something of a parts bin special itself, but was mostly based on a 1985 Trek 760 road bike. It had a funky mix of components from the factory, but was put together out of bits and pieces by the shop mechanics of the store that she worked in. When I got hands on it, it was rocking a mix Campagnolo Victory, Shimano 600, and Cinelli parts.
She rode the bike throughout the 80’s and 90’s, but it became a garage queen after my folks moved to a house a ways up a long and steep hill about 30 years ago. The old-school geometry, skinny tires, and speed-centric road gearing meant that it was extremely difficult to pedal up the hill that they live on. As such, the Trek hung in the garage collecting a new layer of dust every year. It had enough sentimental value to escape the annual garage clean-out, but not enough to have its dry rotted tires and vulcanized brake pads replaced.
I asked permission to give this piece of family history the Shitbike treatment. By this time my folks had seen the positive results of the His And Hers Cannondale-based SBs, and the response was a quick “Go for it!“ I didn’t tell her what she was going to end up with, just that it would eventually come back a changed bike that would hopefully be able to be pedaled up the big hill that they live on.

Design Goals
The primary design goal for this Shitbike, SB3, was to fundamentally change the mechanical nature of the bike with the hope of taking it from vintage road machine into something that could be pedaled comfortably around town, and would have the gearing to make it up the big hill that my parents live on.
Another area in need of a serious upgrade was the brakes. while having the gearing to get up the hill was important, the ability to slow yourself when descending the hill was even more so. The original brakes were Campy single pull cantilevers that clamped on to old Mavic wheels with steel braking surfaces. Brakes have changed a lot in the last three decades, and those updates needed to find their way on to this bike.
Additionally, I wanted to give the bike a really special paint job using some cool shifting and light catching paints. My mom LOVES french fries (I mean, who doesn’t), and I wanted to find a way to pay tribute to this by using some of the design motifs that I used on the other SBs before. These would include a specific font that worked well on the relatively skinny steel tubes, a custom logo, and a little text blurb on the non-driveside chainstay. I wanted to highlight the craftsmanship of the frame and the shapes of the lugs as well.

The Problems
Old Campagnolo
I had never worked on any kind of Campagnolo component before this bike, much less anything as old as this. I quickly gained an appreciation of the proprietary-ness of Campy components, but specifically the propiertary-ness of the rare-ass tools needed to work on them. Thankfully I happen to have a neighbor who has a collection of awesome vintage bikes, but even better, he has all of the tools to work on them. With his help I was able to tear the frame down and build it back again.
Untested Theories
I wasn’t sure that this bike was going to work until it was actually bolted together. The parts mix was wacky to achieve the design goals, and I wasn’t sure that things were going to play nicely, since I was mixing standards from across over 35 years worth of different and evolving bicycle standards. Rear hub spacing, quill stem conversion, a whole new braking system, different wheel materials, and converting to a flatbar were all big departures from the original bike. I’m sure this is not the first, but I can’t imagine that there are many 80’s steel Trek road frames with 1x setups spinning an 11-50t cassette out there.
Paint Durability
I am really proud of how the paint job turned out on this bike. The combination of the color-shifting main color and the rainbow metallic accents make for an eye catching bike that looks unique at every angle. I am also glad that I took the extra time to mask the lugs separately. It was a huge pain in the ass to manually do this, but it was worth it. However. One of the first times that the bike was used, it was locked up against other bikes on a public rack. At some point in the process the Trek received some contact that caused a good chunk of the paint to be gouged out, all the way to the frame. I don’t think that the bump was out of the ordinary for what a bike with a factory paint job should be expected to endure, so this has me revisiting my paint process and materials. Sure, these bikes are designed to be visually unique, but they are first and foremost built to be ridden and should not have to be treated as museum pieces. These paint jobs may never be as durable as a true factory finish, but I want them to be able to cope with the bangs and bumps that are consistent with typical usage.
Skinny Tires
My hope was to put larger tires on this bike to make it more comfortable and stable for riding around town. I overestimated how much frame and fork clearance was available. I was going for at least a 28c or maybe even a 30c, but the final product ended up with 23c tires.

The Outcome
This was a special bike to build for a number of reasons. Personally, it was the first bike that I put together that was not for me or my wife. I am perfectly happy with a certain level of jank in most of my personal bikes, but this one needed to be reliable, comfortable, and just work. From a quality perspective, the required bar was already set higher than what I had completed with my previous projects. Further, this wasn’t just some junk $10 craigslist frame, or a bike that someone abandoned at a bike swap. This bike had family history and memories associated with it, and I wanted the final product to be a vessel that helped create more, not to hang in the garage for the another 25 years.
Mechanically, the bike turned out surprisingly well. It rides really smooth, has a much more comfortable an upright riding position now, and is enjoyably nimble.
The Box Three Prime 9 groupset is also a winner here. The shifts are accurate and snappy, yet smooth. Sure, you’re ‘only’ working with 9 cogs, but you get an incredible range out of those gears. Is this groupo going to win you podiums at XC races or help you build the lightest bike out there? No. But I fully expect it to give reliable and predictable performance for years to come. The price to value ratio with this groupset simply can’t be beat, and I am 100% confident that it will see action on future Shitbike builds.
The brakes are also night and day differences from their 80’s Campy counterparts. The calipers, pads, and levers are nothing fancy, but when modern designs and materials are paired together with a set of wheels with a good alloy braking surface, the results are great. Grabbing a fistful of either brake is plenty to lock up the tires, but they also offer smooth modulation and input response. I’ll be using these Tektros on future builds when I need a cost road brake effective brake from this century.
Paint wise, I would consider this an overall success. To date, all Shitbikes have been painted with spray cans in my plastic-lined garage. Despite being a complete amateur going off of nothing but YouTube, the bikes have turned out pretty well. This paint job is the most ambitious so far as well. It required complex masking, more layer and coats, and additional attention to detail than anything I’ve done before. The paint used on this project is very expensive, but the results I think speak for themselves. It’s really challenging to capture the color-shift effect with a still photo, the real magic happens when you move around the frame and watch the color change before your eyes. I learned early on that the paint job is not as durable as was hoped. This will cause me to reexamine my process, as well as maybe some of the materials I am using. But that small learning opportunity aside, I think the bike came out looking great.
When I delivered the bike to my mom, she did a double take and didn’t recognize it as her Trek 760 from 1985. The look really had changed that much! She was excited to have the bike back, but with some needed modern updates to make it a comfortable and capable town bike. Her feedback on rider position, shifting, and braking were positive, which was great to hear and will help shape future similar builds. Overall, I’m very happy with how this project turned out. It has given me the confidence to continue on experimenting with strange combinations of parts and increasingly intricate and challenging paint jobs. On to the next!

Build Specs
Frame
1985 Trek 760, Reynolds 531 C tubes
Fork
Stock Trek fork, also Reynolds 531 C
Wheels
Bontrager Race Lite
Brakes
Tektro R533
Rear Derailleur
Box Three Prime 9
Cassette
Box Three Prime 9 X-Wide 11-50t
Shifter
Box Three Prime 9 Multi-Shift
Chain
Box Three Prime 9
Headset
Stock Campgnolo Victory
Stem
Zoom quill-to-threadless converter, Vision stem
Handlebar
No-name mid rise flat bar
Seat
Bontrager
Bottom Bracket
Stock Campagnolo Victory
Crankset
Stock Campagnolo Victory
Chainring
Stock Camapgnolo Victory, large ring removed
Grips
Syncros ergonomic grips
Tires
Bontrager R2, blue
Seatpost
No-name seatpost
Paint
Custom Canz Black Primer, Custom Canz Spectracoat Silver (lettering and lugs), Custom Canz Chromacoat Peacock, Spraymax 2K high gloss clear coat

Besides the seat, tires, and tape, this bike was as it was built in 1985.


Notice the small details on the lugs.


Some 600 thrown into the Campy mix for good measure.


Disassembly begins.


Just a good looking crank.


Super-legit chemical stripping station.


Chemical stripper starting to work.


Clean fork!

Next up, the frame.


Test strips for the frame. The photos don't do the colors justice.


Forks primed and ready for color. This Trek fork is on the left.

Silver Spectracoat color applied to the fork crown.


The curves really make the rainbow effect pop!

Painted fork crown masked, Chromacoat Peacock applied to fork legs before clear coat.

Completed fork! The crown masking was a pain, but the results were worth it.


Some of the Peacock color shift can be seen here.

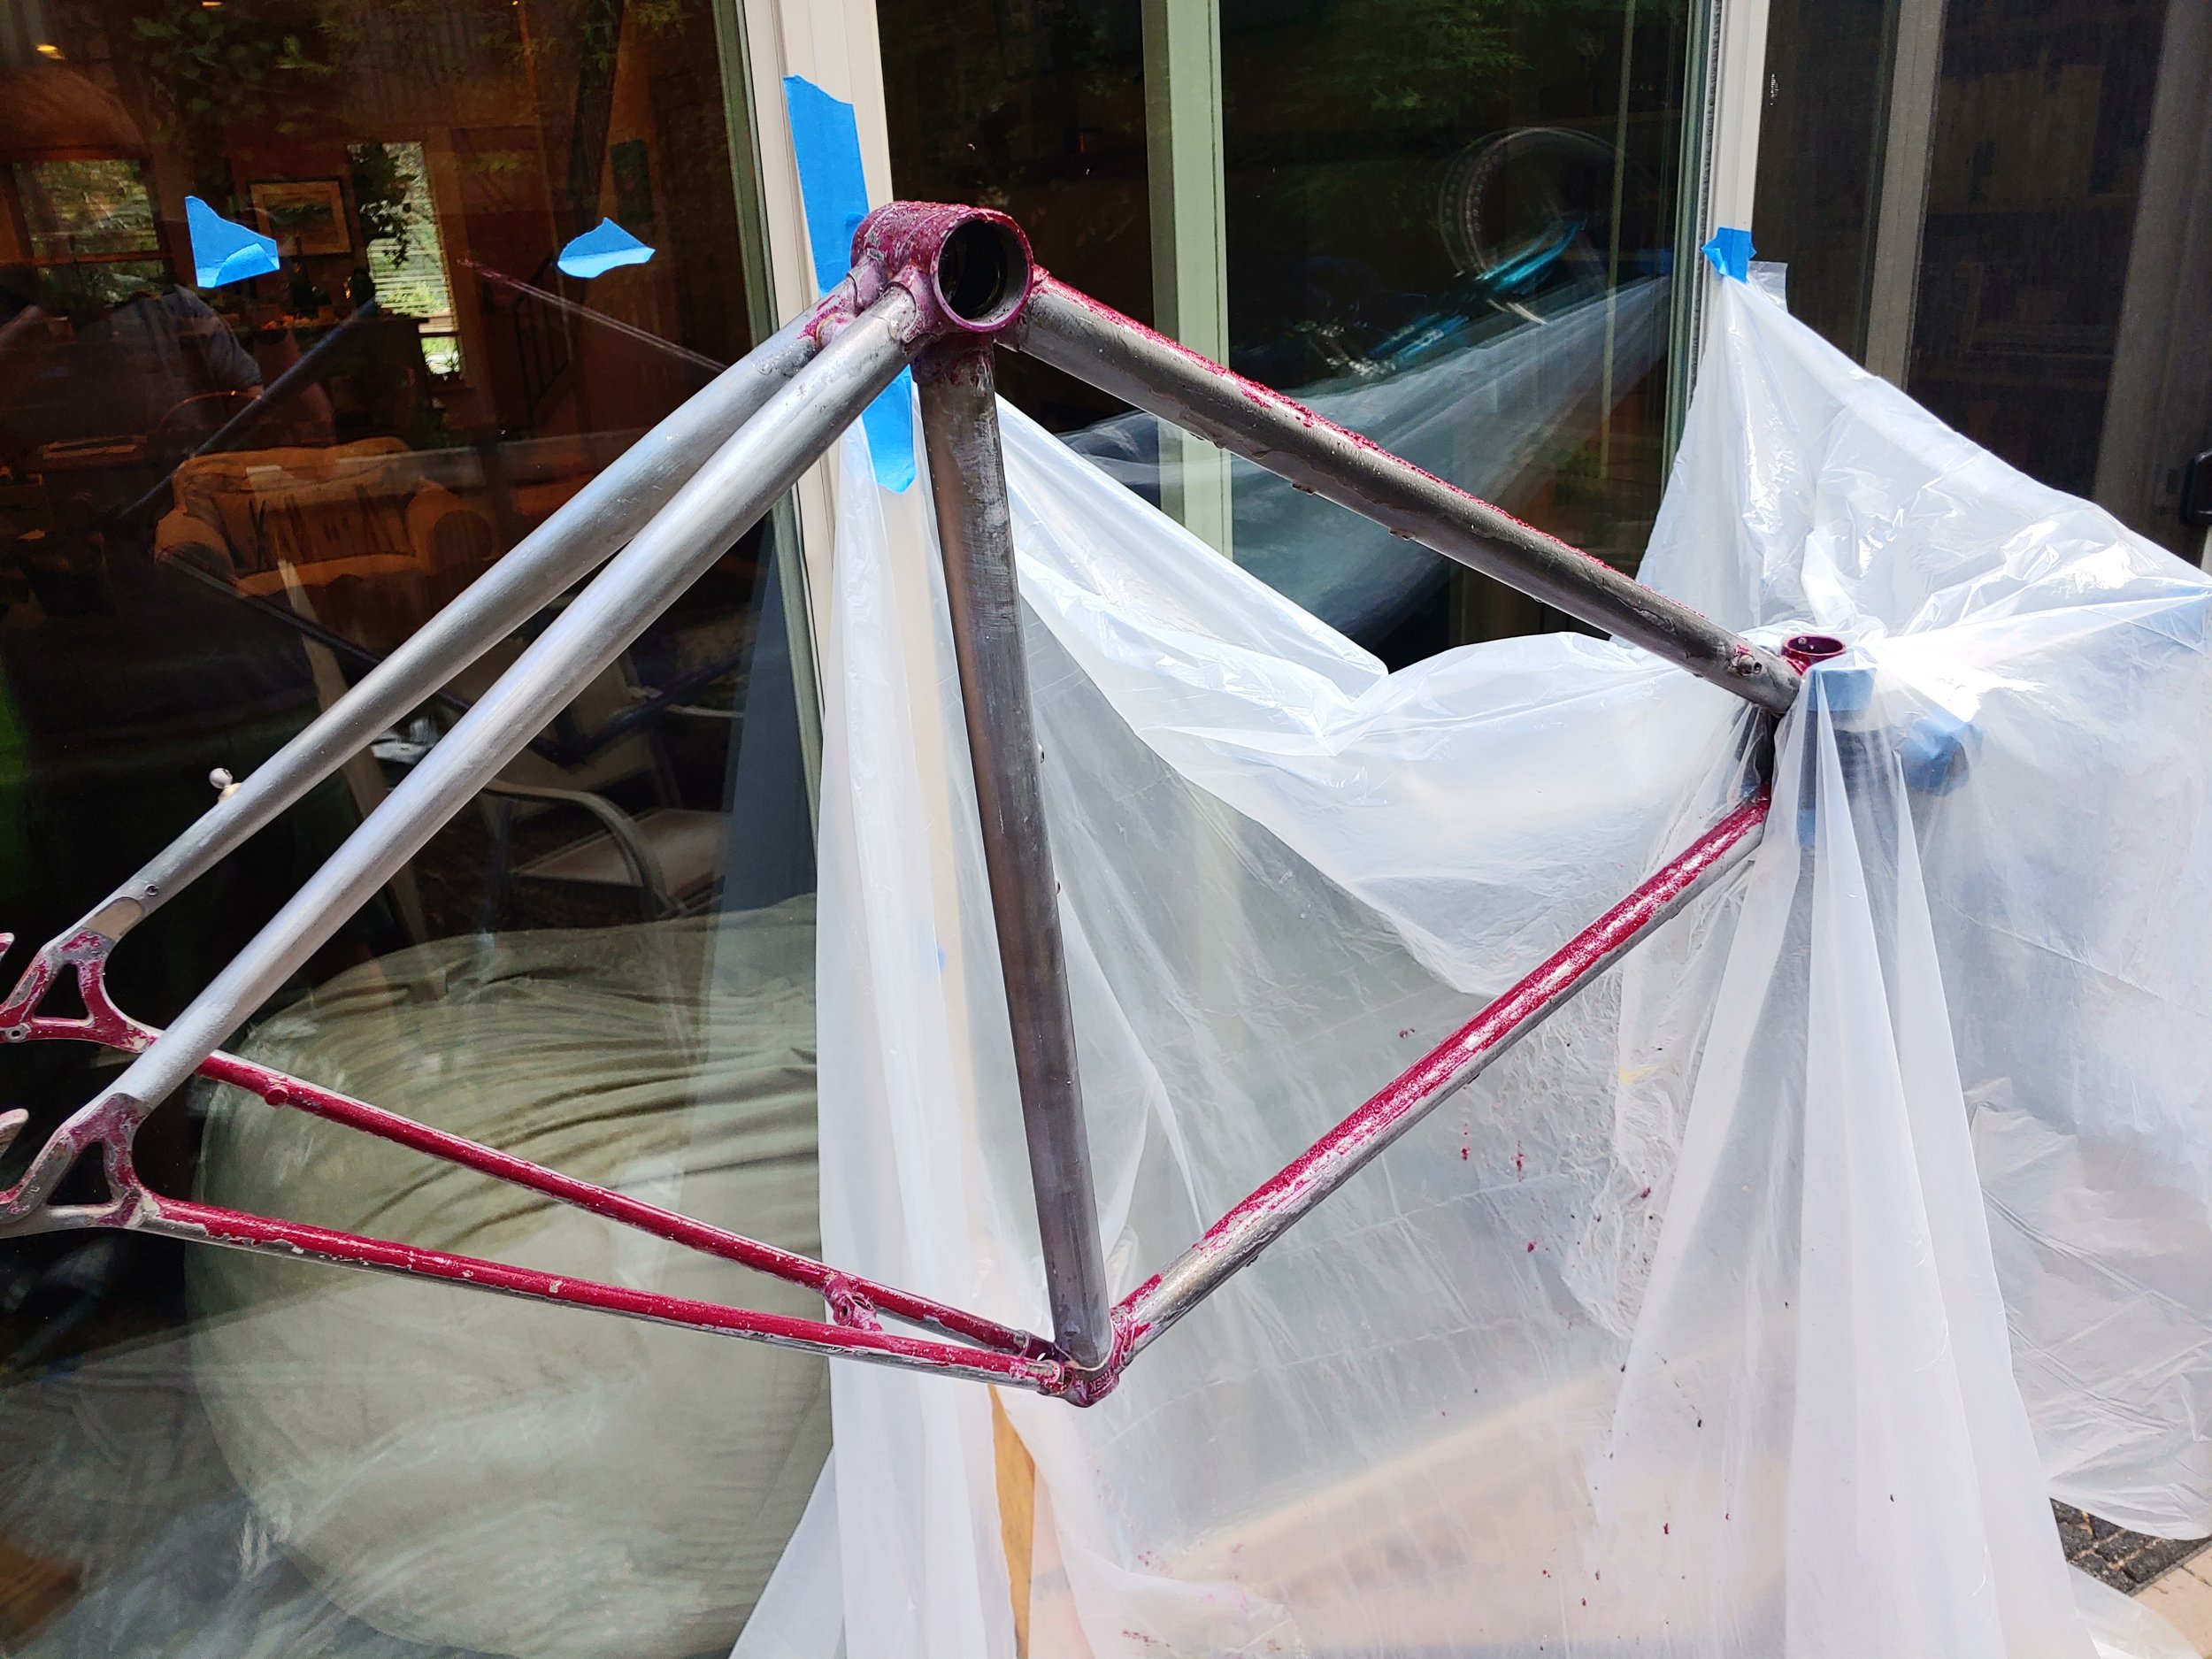
Frame primed and ready for Spectracoat Silver in areas with lettering and logos.


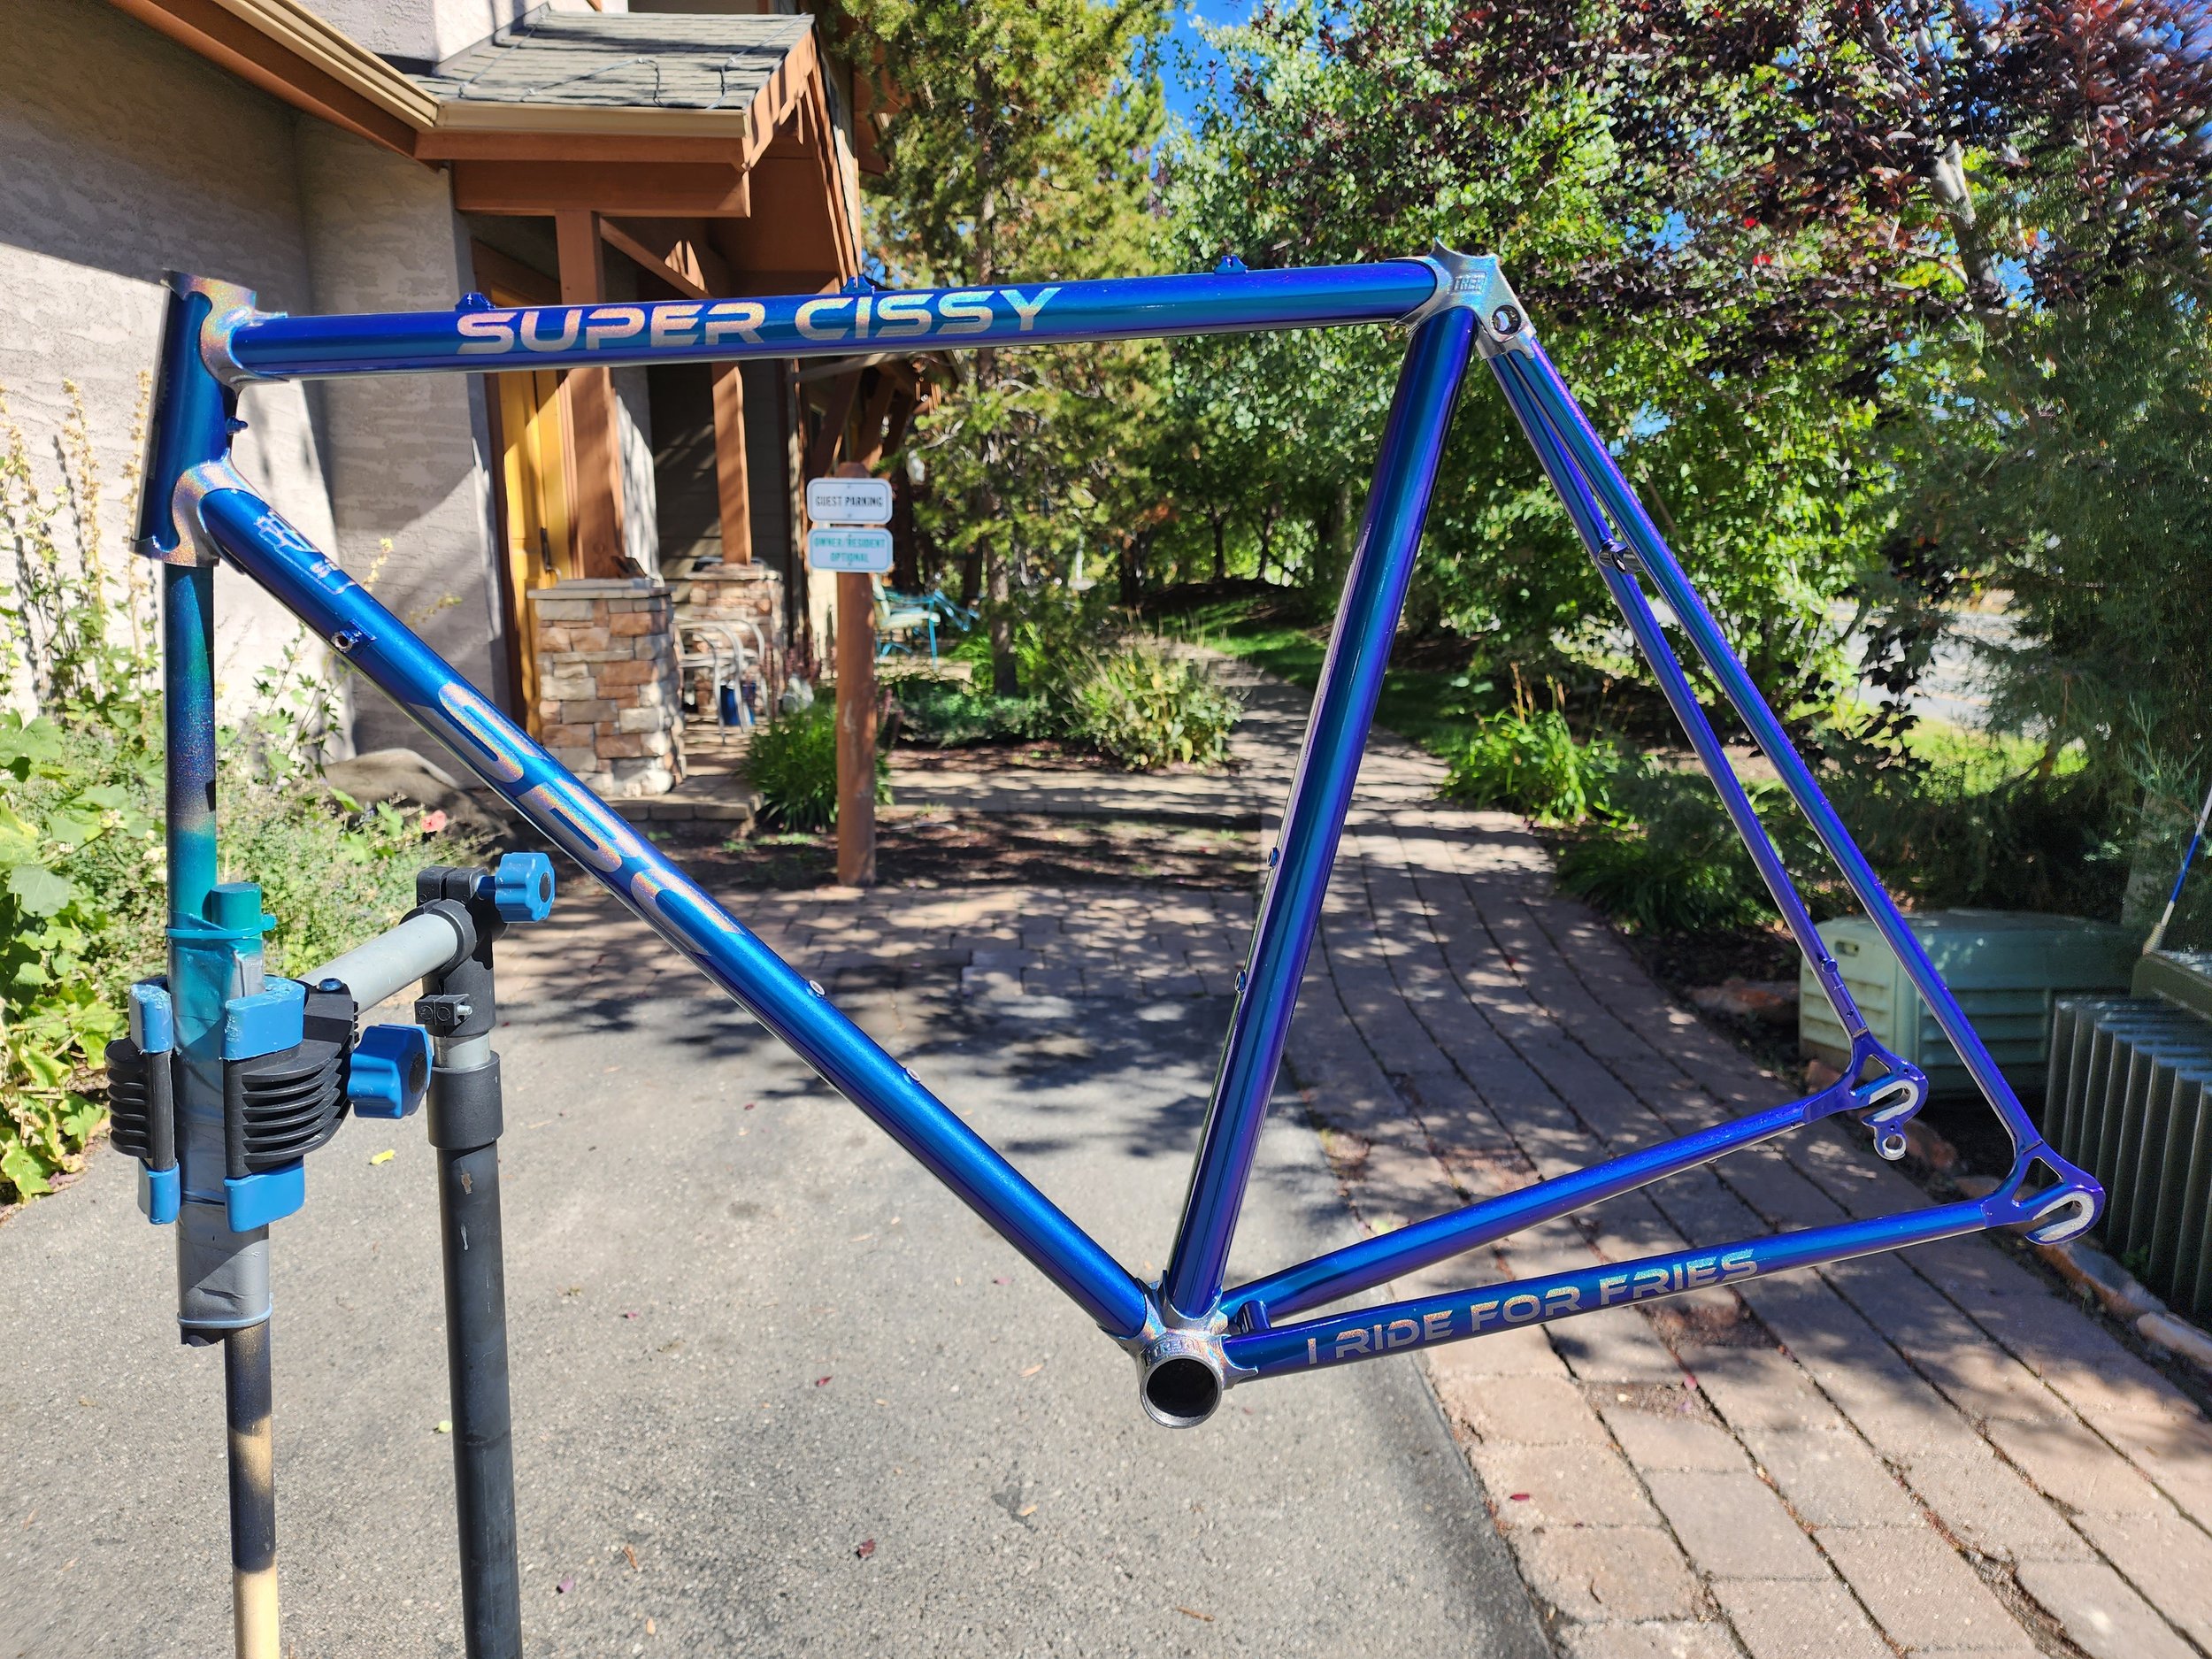
Completed frame with clear coat! The extra was to mask the lugs was well worth it.
Notice the color shift on the paint. Blue on the left, purple in the center, and green on the right.


SN: 69-SB3

Stock Campy bottom bracket cleaning and reinstallation.


Reuse of the stock Campagnolo headset, but with a stem converter.


One step closer.

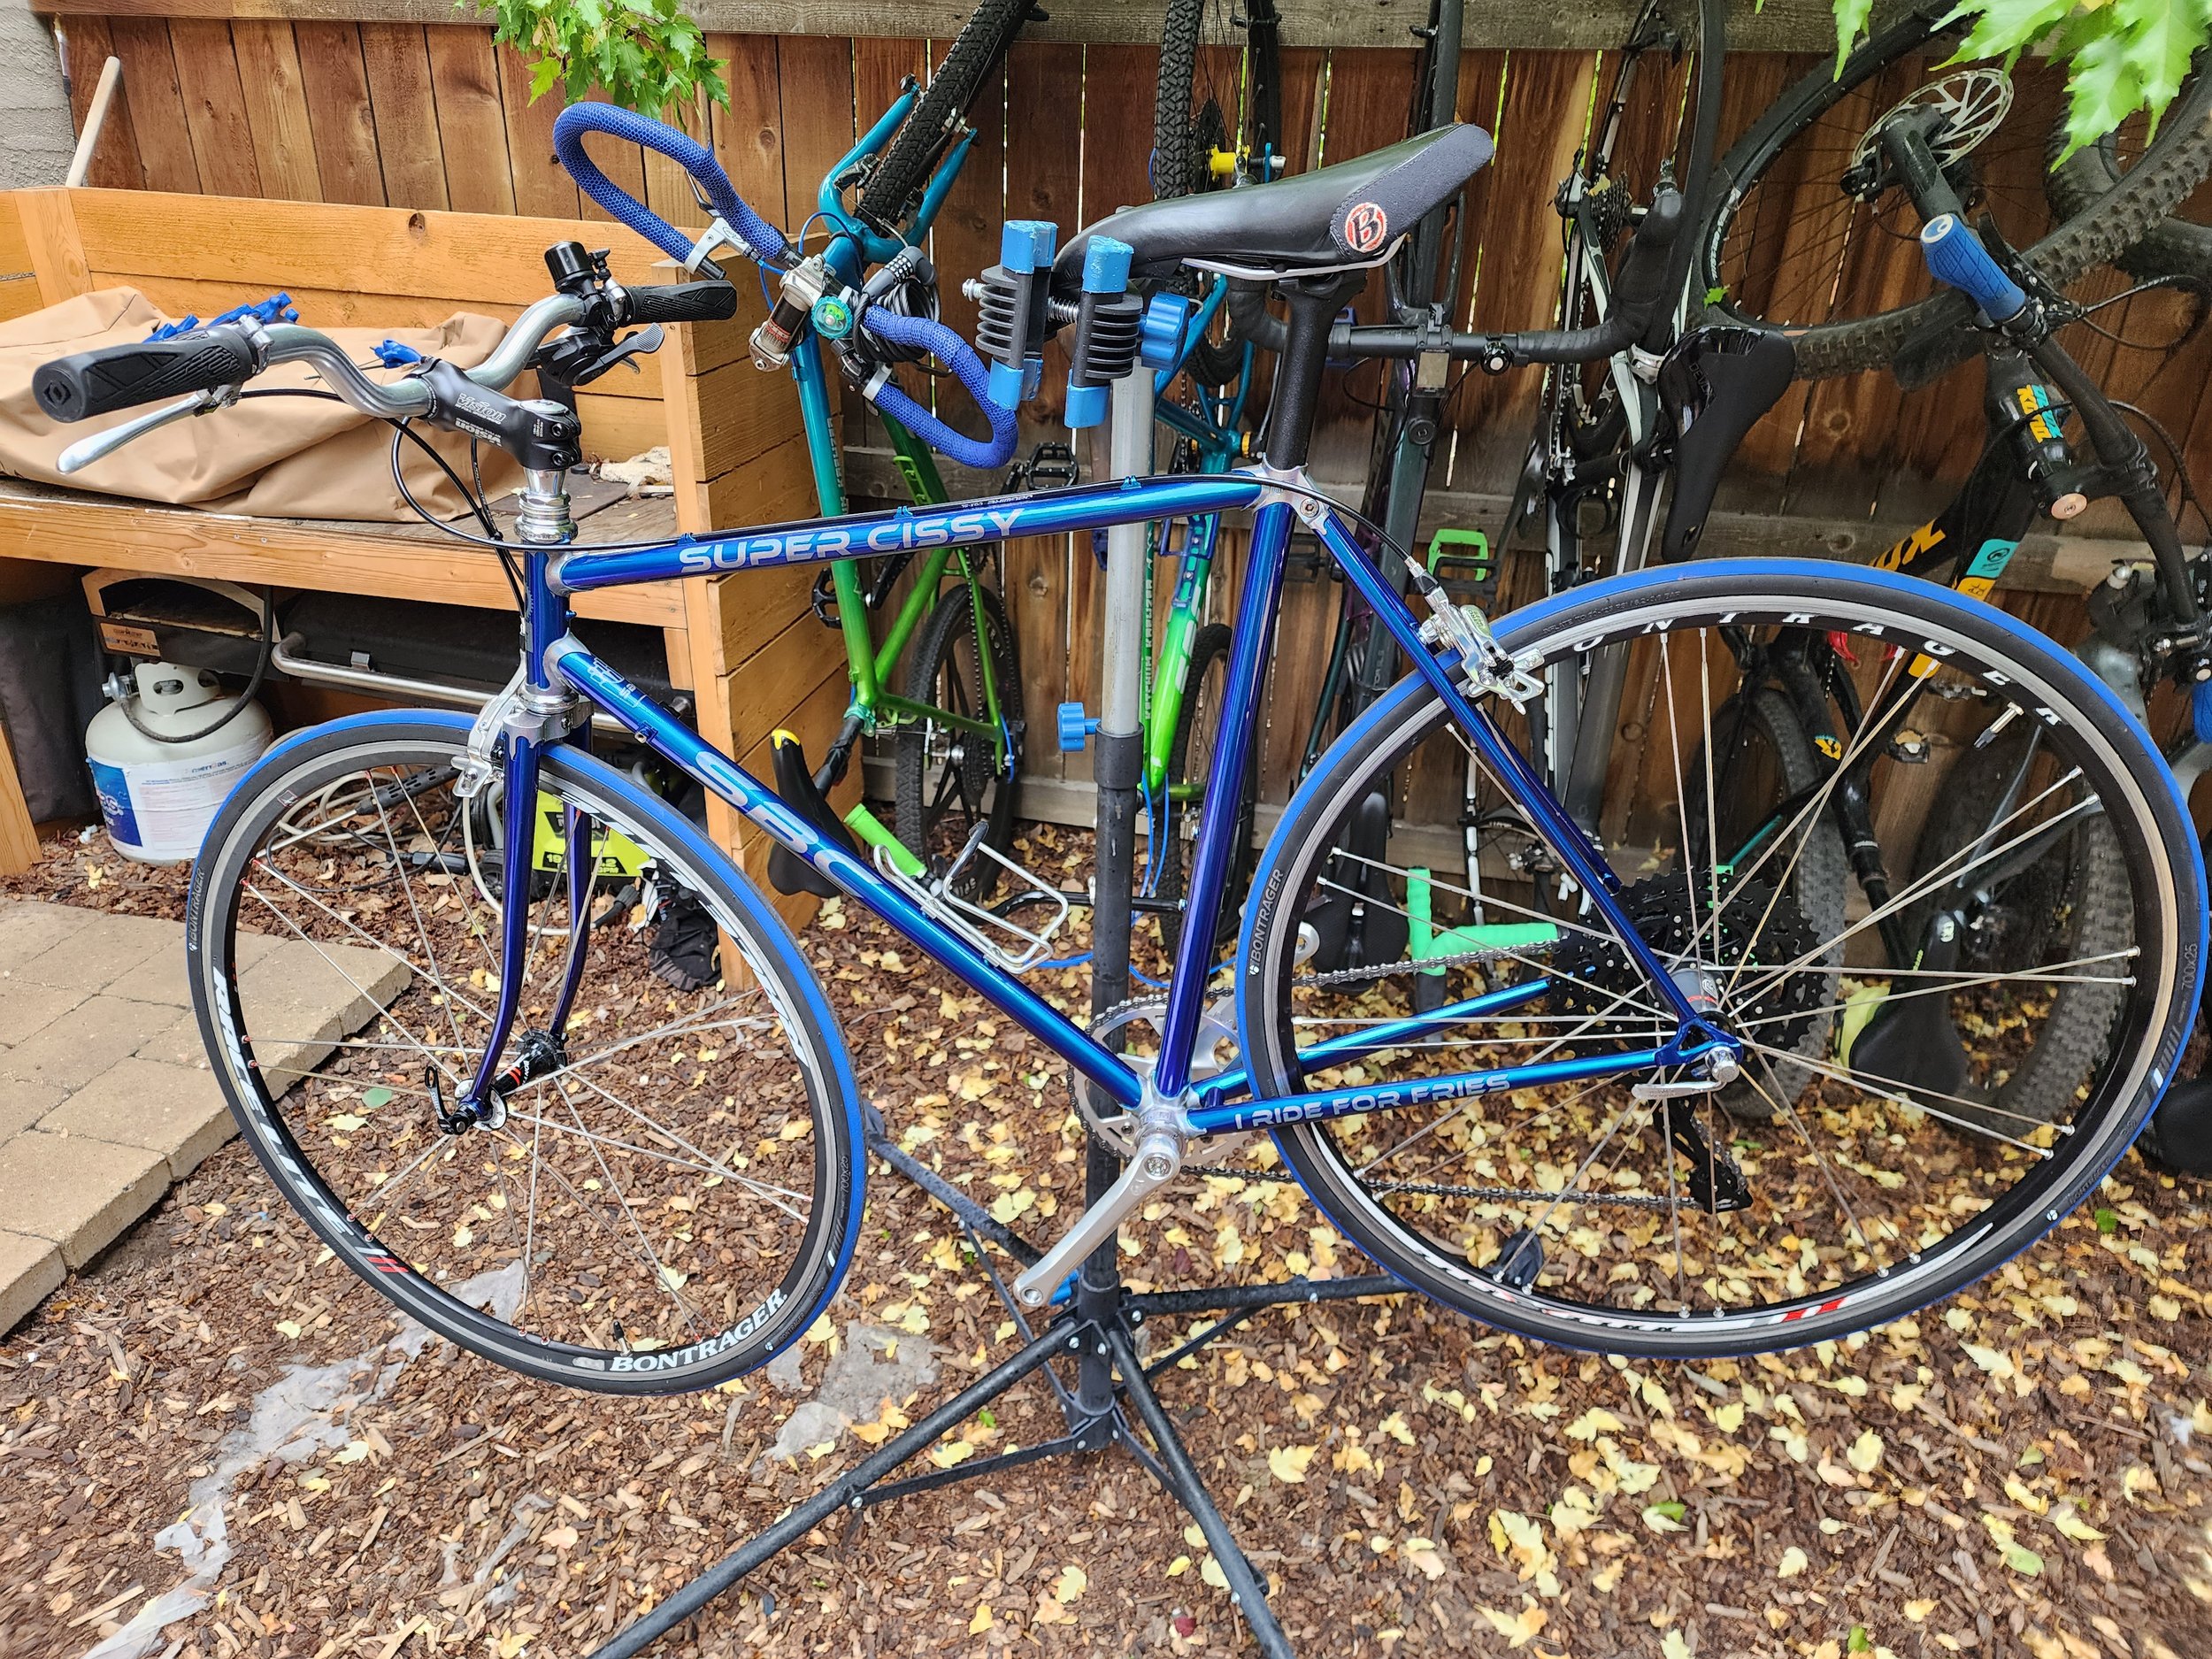
Houston, we have assembly!


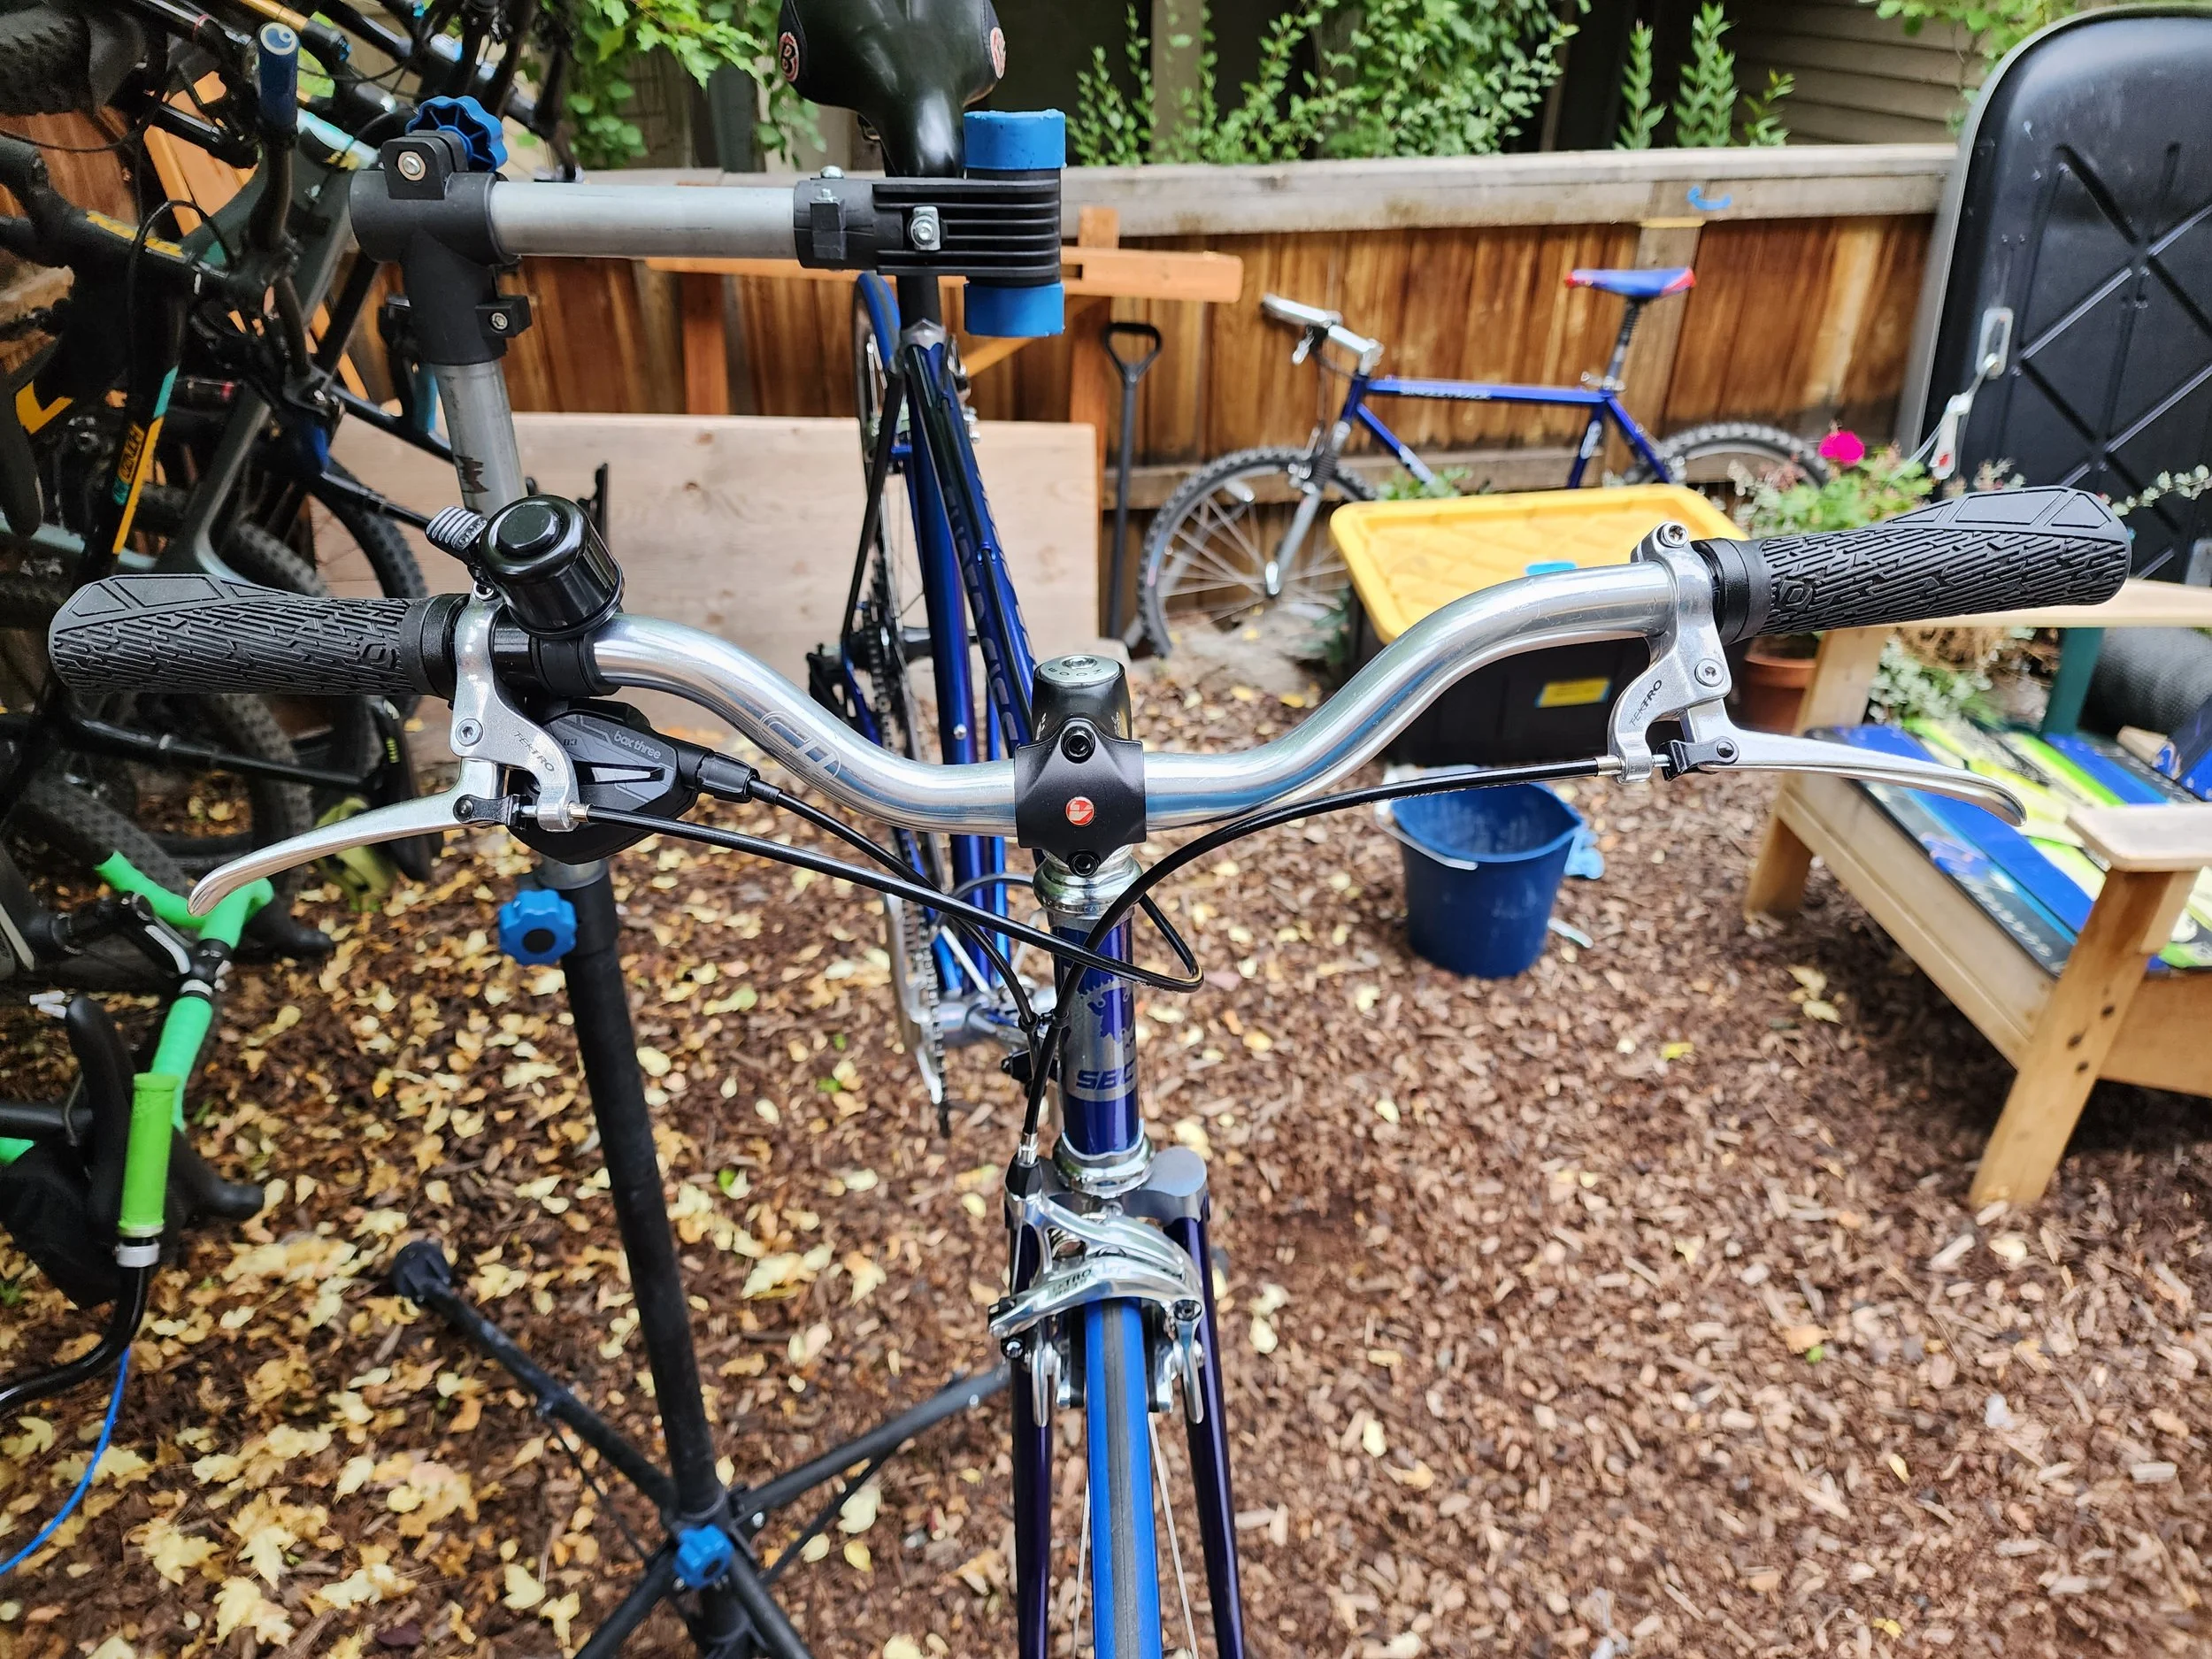
The cockpit looks a little different than it did in 1985.


Modern dual pivot brakes made a huge difference.