

The Ketchum Krewzer (His)
The Ketchum Krewzers were the first real Shitbikes.

The Story
The first true Shitbike builds came about because of chance, stupidity, and a dose of hoarding. The real genesis here is the pair of 26” Spinergy Rev-x Roks that fell into my lap for free. I am a product of the 90’s, and started mountain biking in the later years of that decade. I can remember going into the local bike shop with my dad and seeing those spicy carbon blades mounted up the whatever the new hotness was at the time. So when I scrolled past a ‘come get it for free before I throw it out’ post with a photo of the Spinergys among other junk, I dropped everything to scoop them up. Now I had an iconic pair of wheels, but no bike to put them on…
The donor frame for this SB came by way of being orphaned at a local bike swap. The bike was a 1992 Cannondale M800 “Beast Of The East”. It was dropped off for sale, then never picked up, despite multiple attempts to contact the previous owner. After sitting on the side of the shop that ran the swap for several weeks unclaimed, its fate was sealed to become the ‘His’ half of the ‘His and Hers’ Shitbikes. The ‘Hers’ of course being the 1993 C’Dale M500.
The frame was in overall very good condition, and I felt bad about tearing it down and stripping it to the bare metal. It seemed as if Someone bought it in 1992, rode it for one or two seasons, then hung it up in the garage until taking it to the swap in 2021. It had various small scratches and scrapes, but was otherwise a perfectly rideable LX-equiped vintage bike. But it all had to go in order to match the SB that I was building for my wife.

Design Goals
The primary design goal for the first Shitbike, henceforth designated SB1, was simple. Make something cool that would allow the Spinergy wheels to shine. The wheels are known for having reliability problems, especially at this age, so something that would take hard hits was never on the table.
I settled on wanting to create a cool town cruiser/bar bike that would fulfill the roll of carrying my thirsty self into town for a pint at the local brewery. A Trek Emonda was filling that roll at the time. A retro build based on an old 26” mountain bike would be much slower, but could be made more comfortable.
Another goal was to learn how to rattlecan a frame at home, and have it turn out looking acceptable. This video from ETOE Designs is what pushed me over the edge and convinced me that maybe I could bodge something together that didn’t look butt-turrible. For the actual paint color choice, I wanted a finish that showed off the raw texture and superior welds of the frame, and a candy finish is the perfect way to do this. This way you get a powerful blast of color while still getting to see the workmanship of the raw metal. And my wife picked the colors :)
Additionally, I wanted to use up some parts that I had kicking around in my stash. A near universal constant for bike shops is The Parts Bin. This is usually a tuperware buried under a counter that contains take-off parts that are too nice to toss, but otherwise are in a condition that prevent them from being sold or otherwise added to customers’ bikes. Often parts end up here because customers upgrade components and don’t need their original parts back. These bins are gold mines for people like me, and are why I was sitting on a handful of nice components without a job to do.
Finally, I wanted to learn! I had never completed a frame up build before, and I wanted to see what the process was.

The Problems
IDK What I’m Doing ¯\_(ツ)_/¯
The biggest challenge of this build is that I didn’t know what the hell I was doing. Like, at all. The level of overall aptitude was ‘look up a Park Tool video by Calvin Jones’. (These are INCREDIBLE resources, by the way.)
Painting is hard
I had never painted, well, anything before this bike. Trying to understand the steps, procedures, and processes was definitely a new experience. Add figuring out how to turn a one-car garage into a hacky paint booth into the mix, and something is bound to go wrong. Thankfully nothing went catastrophically sideways, but I definitely learned a few things that made each subsequent painting session at least a little bit easier.
Label your crap
I’m sure this is familiar to just about any mechanic out there, but I learned on this one to label every little nut, bold, fastener, and plastic piece that comes off a frame during a teardown. It was close to six months between when I stripped the frame and was ready to build it back up. When tearing it down I thought to myself “Oh, I’ll totally remember what that unique little doodad is for. No way that I would forget something so important.” Ahahaha, that was not the case. Since then, I’ve labeled every little water bottle cage bolt and bottom-bracket-cable-guide-holder-on-er screw that comes off of a frame.

Build Specs
Frame
1992 Cannondale M800 “Beast Of The East”
Fork
Stock aluminum Cannondale Pepperoni
Wheels
Spinergy Rev-x Roks (AWWWWWW YEAH!)
Brakes
Front, Shimano XTR - Rear, Shimano XT
Rear Derailleur
11 speed Shimano XT
Cassette
11 speed Shimano XT
Shifter
11 speed Shimano XT
Chain
11 speed Shimano Deore
Headset
Stock Tange-Seiki Oversize Headset
Stem
Softride suspension stem
Handlebar
“Butterfly” style touring bar
Seat
Selle Italia Turbomatic 2
Bottom Bracket
Origin8 External BB
Crankset
Race Face Turbine
Chainring
Race Face Cinch direct mount, 32T
Grips
Foam bar tape
Tires
Hybrid cruiser
Seatpost
Specialized post
Paint
Transparent automotive primer, Custom Canz Candy Green and Candy Blue, Spraymax 2K high gloss clear coat
Chemical stripper vs. 30 year old paint.


11 speed Shimano XT cassette test fit on the Spinergys.

These unfindable brake bosses almost killed the build.
Paint color test strips.


I tried a glow in the dark color, but it wasn't bright enough for the real deal.
DIY garage paint booth. More than one neighbor said it gave them 'Dexter' vibes.


Frame with colors applied. The black lettering and logos are vinyl decals that are masking the raw aluminum from color.


Frame with masking decals removed and bare metal shining through.


Gotta have a serial number!
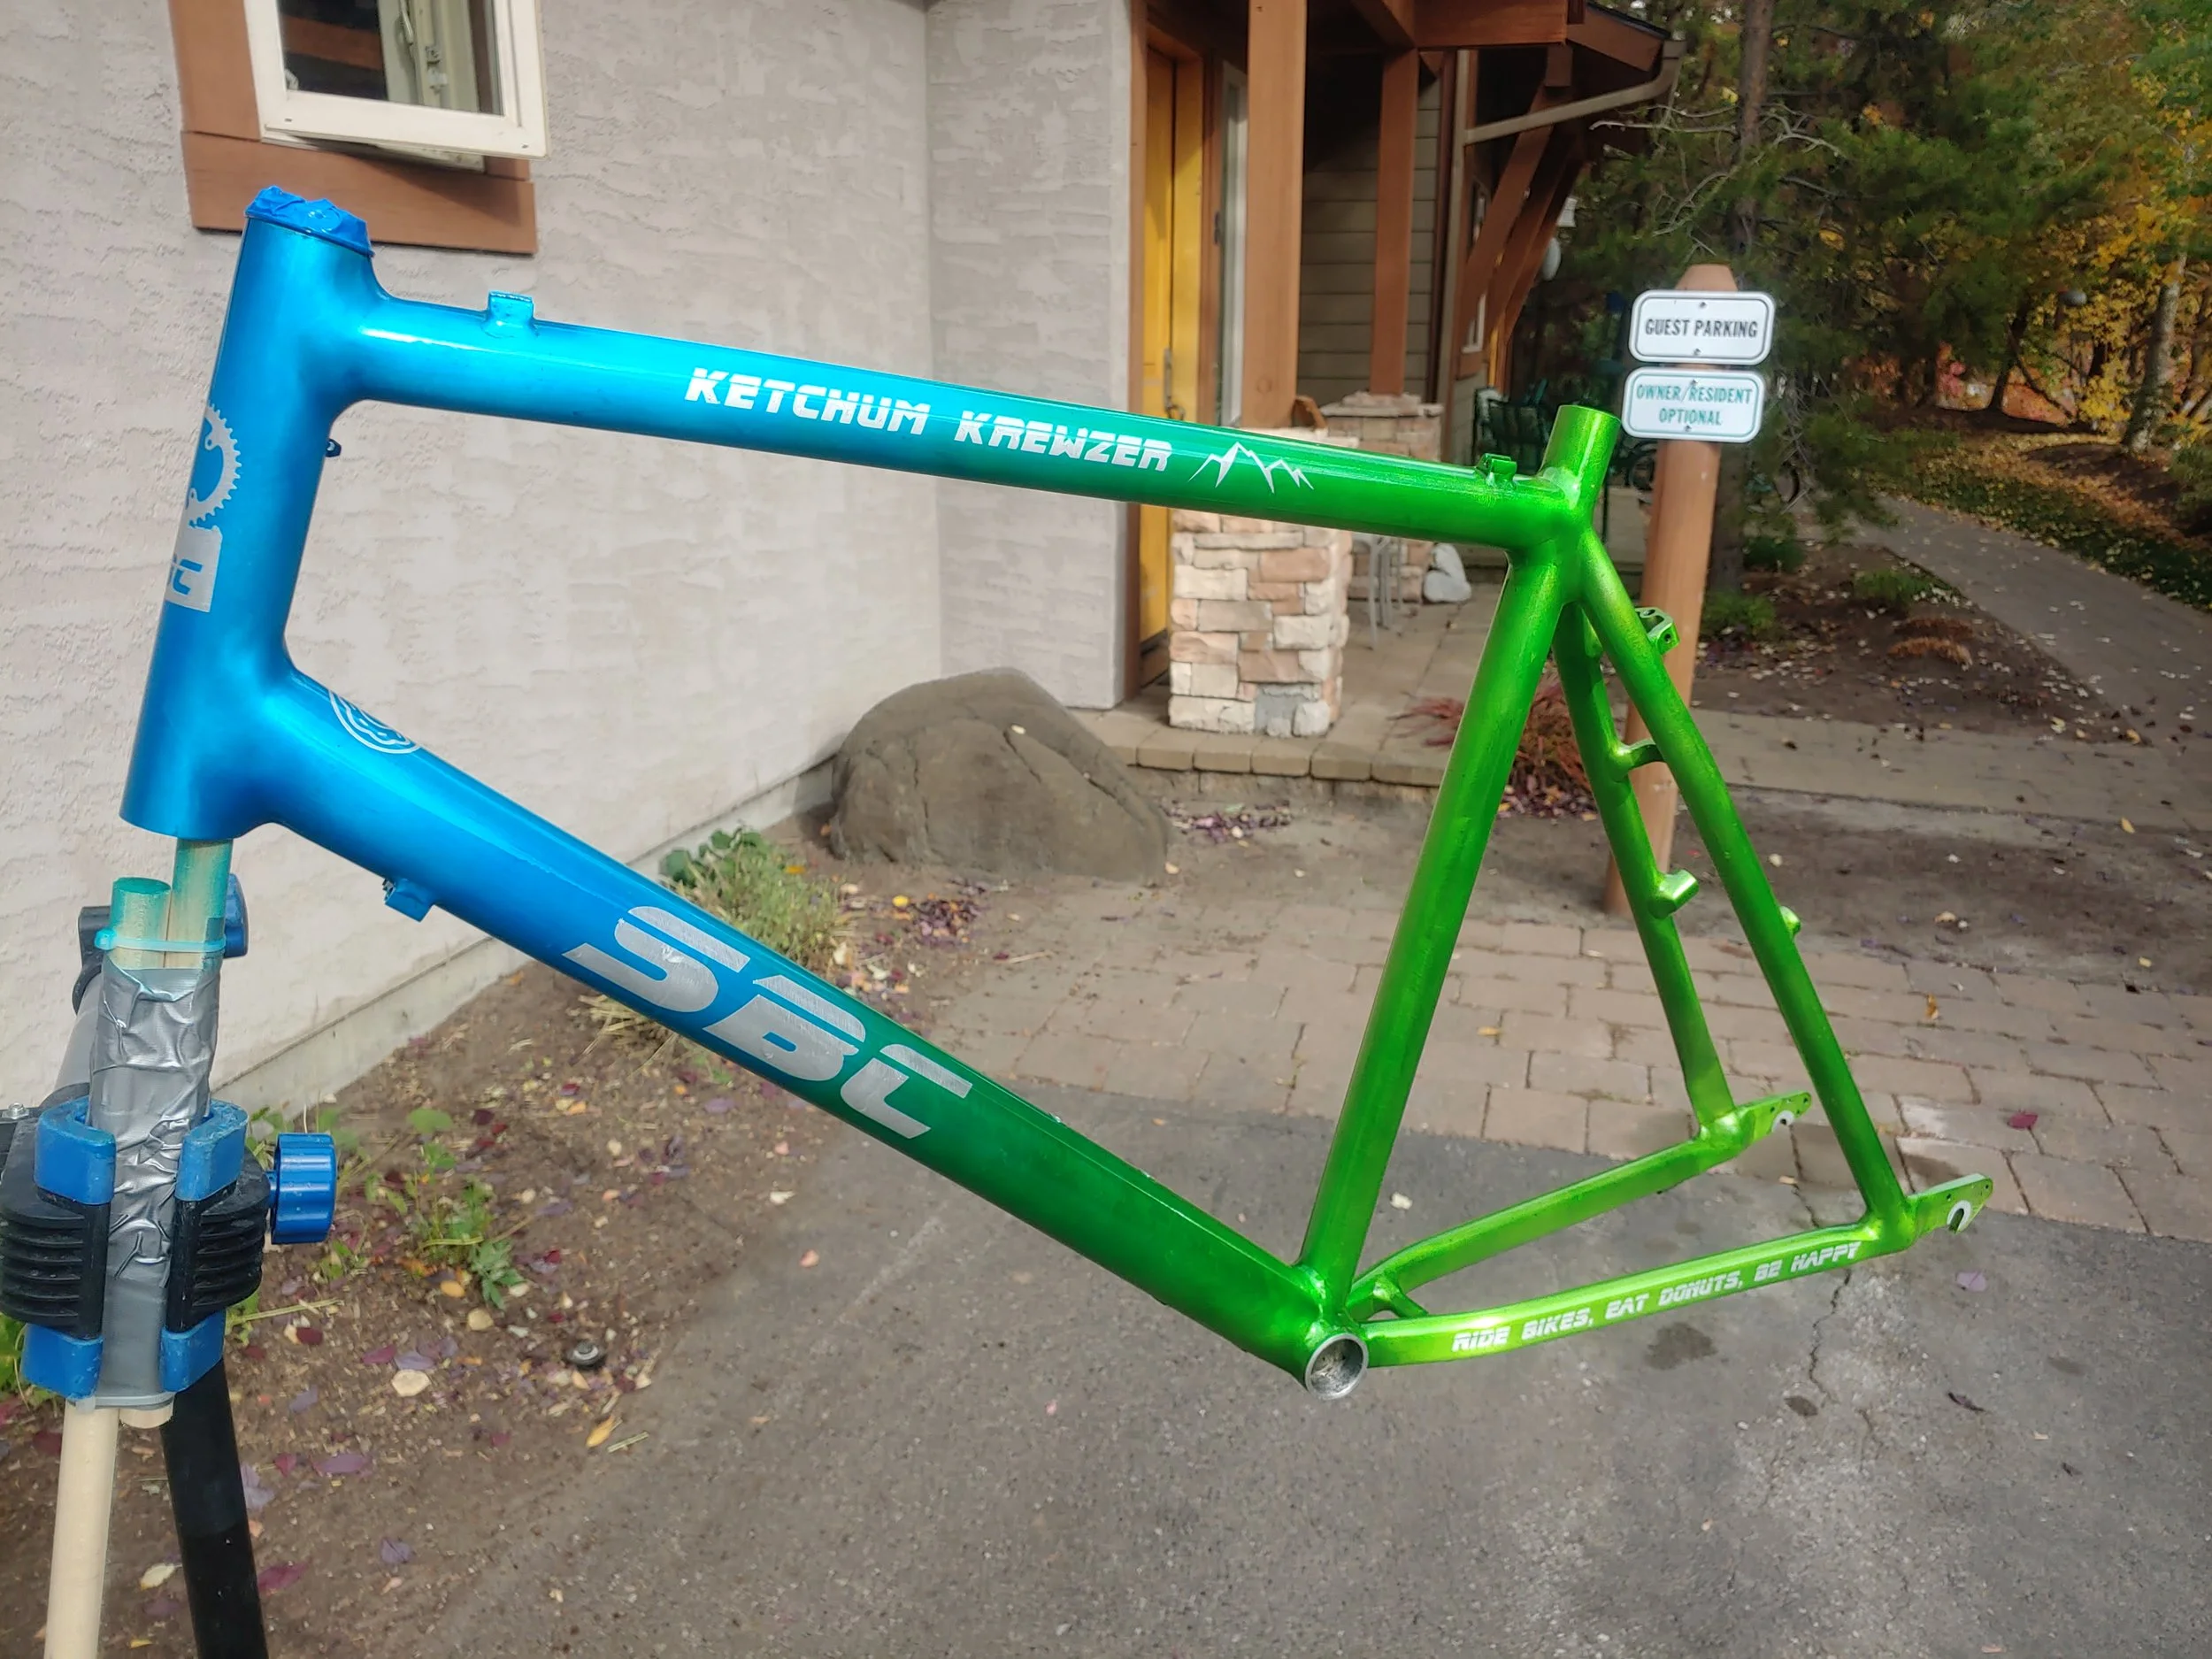
The candy color really pops in direct sunlight!


I made a 'commemorative' shirt after completing the build.


Final product!

The Ketchum Krewzer siblings.